Table of Contents
Configure OpenMW
To start is simple, execute openmw-wizard and using the GUI select “Existing Installation” and locate the morrowind.esm file in the Data Files OpenMW directory you created. The wizard will also convert the morrowind.ini contents to the format of OpenMW in ~/.config/openmw/openmw.cfg.
Once done start the game using the launcher (openmw-launcher). The launcher may ask to import the ini file again, refuse in the case because it has already been done. The launcher allows to set up many options with ease. Then start the game and give a look to the in-game options.
Now in ~/.config/openmw are the configuration files:
openmw.cfgwhere you configure mods.settings.cfgwhere you configure the game.
Settings (launcher)
The settings can be altered using the launcher or manually. The launcher is limited, but it is easy to use for the options that are there.
Important ones are:
- Graphics > Lighting
- Put Shaders
- Graphics > Shadows
- Enable everything, but if performance is a problem here is a place to look.
- Advanced > Visuals
- Animations
- Activate everything
- Shaders
- Activate everything, but Use anti-aliasing alpha testing
- Fog:
- Activate everything
- Terrain
- Activate Distant Land and Active grid object paging,
- Put Object paging min size to 0.01
- Set Viewing distance to 3.9 Cells
- Models
- Activate Day night switch nodes
- Advanced > Interface
- Enable everything,
- Scale the GUI to 1.25
- Advanced > Bug Fixes
- Enable everything
Once did the initial set up you will probably never use the launcher again.
Screenshots are taken in .png format. The png format is lossless and unless you need to share some subtle graphic related bug it just makes large files. Before sharing on the internet you should convert in jpeg format.
Using imagemagik classic command line tools you can convert a whole directory of .png files with:
$ for png in *.png ;do convert "$png" -quality '85%' "${png%.*}".jpg ;done
Settings (text file)
Many useful settings do not appear in game itself or in the launcher. We need to edit the settings.cfg file manually. The whole list is in the documentation. We cover some important ones here too.
The config file has a ini syntax, with sections (like [Water]) and values (like shader = true). As one naively expects: if a settings is there you can edit it, if it is not there but there is its section you have to append to the section, if there is neither the section and the setting you have to add both.
Scaling textures
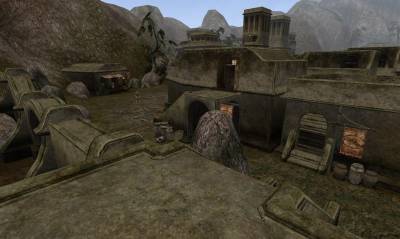
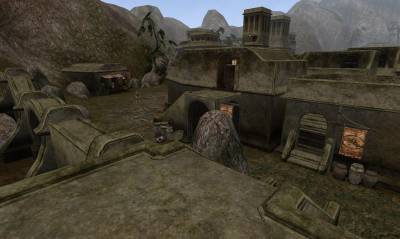
Textures are often scaled by the game to wrap the objects they appear on; this setting will make the textures appear sharp instead of blurred. However, it is a matter of taste: my “sharp” is your “deformed”, my “blurred” is your “smooth.”
[General]
texture mag filter = nearest
texture min filter = linear
texture mipmap = linear
The higher resolution the textures the subtler is the difference. Here is an example with vanilla textures, the difference is mainly visible around the stone.
Post processing shaders
[Post Processing]
enabled = true
Then in game you can set up the shaders pressing F2. Post processing shaders are another kind of mod and need to be installed similarly.
Groundcover
Several mods add grass to the world of Morrowind. Grass is treated differently than normal models, here are the options to use those mods.
[Groundcover]
enabled = true
min chunk size = 0.5
stomp mode = 2
stomp intensity = 2
rendering distance = 20000
Shaders
The default value for lights replicate quite faithfully the looking of morrowind.exe, but the game can easily made prettier using more advanced light settings.
[Shaders]
force per pixel lighting = true
clamp lighting = false
Sound
The buffer size may need no changes, but if you use mods increasing the quality of sounds you may have a game where everything is smooth, but suddenly lag when a NPC greets or the game plays a sound. If you get this experience, use the following settings.
[Sound]
buffer cache min = 112
buffer cache max = 128

